How-to Guide: Mastering Concrete Leveling Techniques
To master concrete leveling, start by preparing the area. Clear debris and mark boundaries for a smooth result. Equip yourself with tools like a concrete leveler, trowel, and screed. Once concrete is mixed to the right consistency, pour and evenly distribute it. Use the screed to strike off excess concrete, then use the float to smooth the surface. Speed matters, as the mixture sets quickly. Advanced techniques like laser leveling can increase precision, while power screeding enhances efficiency. Want to perfect your skills and create even more durable and appealing surfaces? Further discovery awaits.
Understanding Concrete Leveling Basics
Before you master concrete leveling, it's crucial to grasp its basic principles, which involve understanding how to create a smooth, level surface. This process, often referred to as 'slabjacking' or 'mudjacking', is used to correct uneven concrete surfaces by altering the foundation that they sit upon.
Picture this: you're dealing with a sunken driveway or a sloping patio. It's not just about aesthetics, it's about safety and maintaining your property's value. The process starts with drilling small holes into your concrete slab. Then, a special mixture is pumped into the holes to fill the void underneath the slab. As the mixture fills the void, it raises the slab, leveling it with the surrounding area.
It's important that you don't rush this process. The mixture needs time to settle and harden to provide a stable base for your concrete. And remember, precision is key. The objective is to ensure that the slab isn't just level, but also stable and durable.
The beauty of concrete leveling is that it's less invasive and usually more cost-effective than complete concrete replacement. With these basics, you're well on your way to mastering the art of concrete leveling.
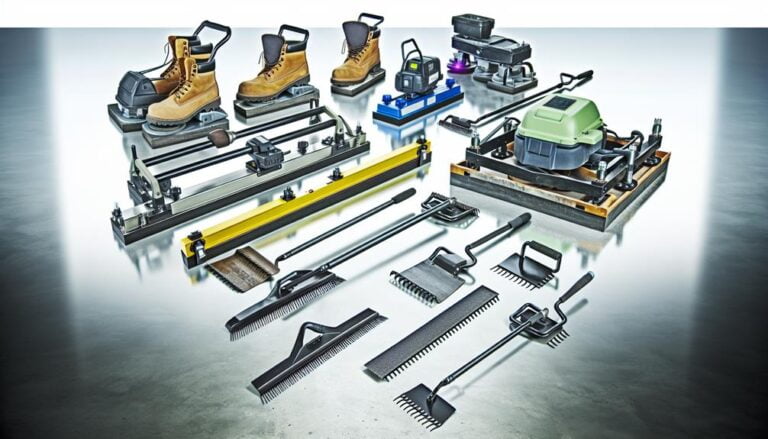
Essential Tools for Concrete Leveling
Now that you've got a handle on the basics, let's gear up and explore the tools you'll need to level your concrete effectively. Concrete leveling is a task that requires precision and the right tools can make all the difference.
Here's a handy table to help you visualize the key tools:
| Tool | Use | Description |
|---|---|---|
| Concrete Leveler | Leveling | A long, flat tool for smoothing and leveling concrete. |
| Trowel | Finishing | A small hand tool used for smoothing and shaping the surface of the concrete. |
| Screed | Spreading | A long, straight tool used to strike off excess concrete to the correct level. |
The concrete leveler is often made of wood or metal and its length allows you to cover a larger area, ensuring the concrete is evenly spread. The trowel, on the other hand, is perfect for those final touches, giving your concrete a smooth finish. Lastly, the screed is instrumental in removing excess concrete and bringing your project to the right level.
With these tools in your arsenal, you're well-equipped to tackle your concrete leveling project successfully.
Preparing the Area for Leveling
To ensure a smooth and level outcome, it's crucial that you properly prepare the area where the concrete will be poured. It's not as daunting as it sounds; you just need to follow a few essential steps.
- Clear the area: First off, you need to clear the area of any debris, vegetation, or existing concrete. This should give you a clean slate on which to work. Removing any potential obstacles now will save you a lot of trouble later.
- Mark the area: Once cleared, it's time to mark out the area. Using stakes and string, define the exact boundaries where you'll pour the concrete. This is an important step as it helps to prevent any accidental overflow.
- Prepare the subgrade: Finally, you'll need to prepare the subgrade. This involves compacting the soil to create a firm, stable base for the concrete. You might need to add a layer of gravel for additional stability, especially if the soil is sandy or loose.
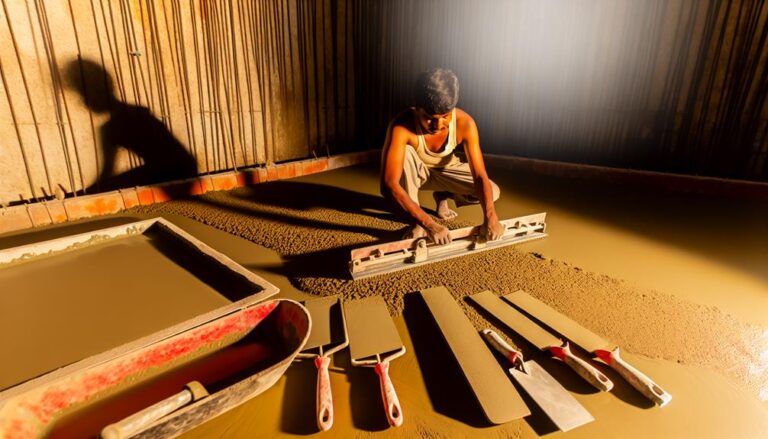
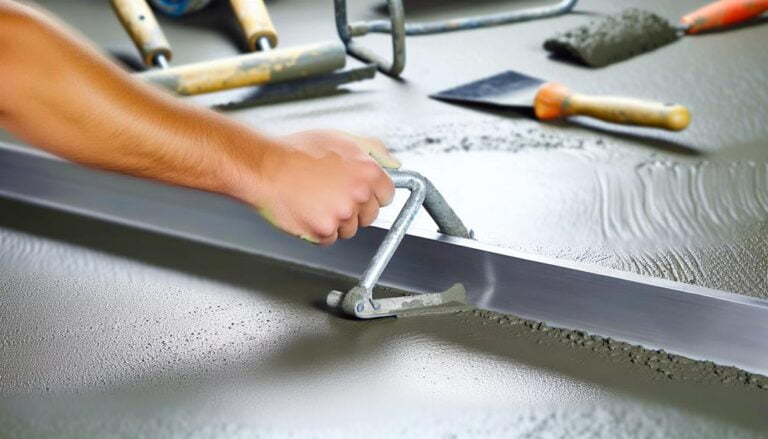
The Process of Concrete Leveling
Once you've prepared your area, it's time to dive into the concrete leveling process itself. First, you'll need to mix your concrete. Follow the manufacturer's instructions carefully, ensuring that you've got the right consistency. It should be thick but still pourable.
Next, pour your concrete onto the area, making sure it's evenly distributed. You can use a trowel or a screed to help spread it out. Be thorough, as you don't want any spots to be higher or lower than others.
Once you've spread out the concrete, it's time to level it. You'll do this by running a straight edge, like a long 2×4, across the surface. This is called screeding. Move the straight edge back and forth in a sawing motion, which helps remove excess concrete and fills in low spots.
After screeding, you'll need to smooth the surface with a float. This finishes the leveling process and prepares the concrete for any finishing touches. Remember, concrete sets quickly, so you'll need to work fast. It's a bit of a workout, but with practice, you'll master the art of concrete leveling.
Advanced Techniques in Concrete Leveling
As you gain confidence in your basic concrete leveling skills, you're ready to explore more advanced techniques that can enhance the durability and appearance of your work. These methods might be slightly more complex, but they'll definitely pay off in the long run.
- Use of Self-Leveling Concrete: This type of concrete is a blend that requires minimal effort to level. You pour it into the area you want to level, and the mix flows to fill in the low spots on its own.
- Laser Leveling: This method involves using a laser level tool to ensure precision and accuracy in your work. It's particularly effective for larger concrete leveling projects.
- Power Screeding: This technique utilizes a motorized tool known as a power screed. It vibrates and levels the concrete more efficiently than manual methods. This is ideal for bigger projects and can significantly reduce labor time.
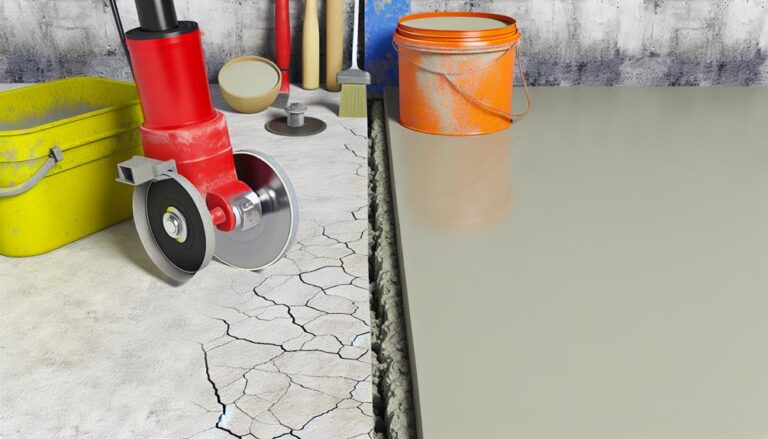
Maintaining Leveled Concrete Surfaces
Proper maintenance is crucial in preserving the durability and appearance of your leveled concrete surfaces. These surfaces, if not maintained, can deteriorate over time, leading to cracks, uneven surfaces, and possible structural damage.
You can maintain your concrete surfaces by regularly cleaning them, sealing any cracks immediately, and resealing the surface every few years. Not only does this prevent damage, but it also keeps your concrete looking fresh and new.
Here's a simple table to guide you on how to maintain your leveled concrete surfaces:
| Maintenance Task | Frequency |
|---|---|
| Clean Surface | Weekly |
| Seal Cracks | As needed |
| Reseal Surface | Every 2-3 years |
Regular cleaning involves sweeping and washing the surface to remove dirt and grime. For sealing cracks, you'll need a quality concrete sealant. Apply it to the crack, smooth it out, and let it dry. Resealing involves applying a protective sealant over the entire surface.
Frequently Asked Questions
What Are the Cost Implications of Professional Concrete Leveling Versus Doing It Yourself?
You're wondering about the costs of professional concrete leveling versus DIY. Hiring a pro can be pricier, but they bring expertise and specialized tools.
Doing it yourself can save money upfront. However, you'll need to invest in tools and materials, and if you're not experienced, you risk errors that can lead to costly repairs.
It's a balance between upfront costs and potential risks, so consider your budget, skills, and time before deciding.
Are There Any Specific Safety Precautions to Take When Leveling Concrete?
Absolutely! Concrete leveling can be as dangerous as wrestling a crocodile if you're not careful. Always wear protective gear like gloves, safety glasses, and steel-toed boots.
Make sure you're using the right tools and equipment, and that they're in good condition. Don't forget to keep your work area clean and clear of obstacles.
And remember, if you're not confident about doing it yourself, there's no shame in hiring a professional. Safety first!
Can I Use Concrete Leveling Techniques on Other Types of Surfaces Such as Asphalt or Brick?
While you can certainly apply some principles of concrete leveling to other surfaces, you can't directly use the same techniques on asphalt or brick. These materials have different characteristics and require different handling.
It's essential to understand the specific requirements and techniques for each surface. So, while some knowledge might transfer, you'll need to learn and apply techniques designed for asphalt and brick.
Always remember, the key is in the material's unique properties.
How Does Weather Affect the Process and Outcome of Concrete Leveling?
Ironically, you'd think weather isn't a big deal, but it's crucial. Wet, cold conditions can cause concrete to set slowly, affecting its strength. On the flip side, hot, dry weather can make it set too quickly, leading to cracking.
Ideally, you want mild, dry conditions. So, always check the forecast before you start leveling. If the weather's not cooperating, it's best to delay. After all, you're not just making pancakes here.
Are There Sustainable or Eco-Friendly Alternatives to Traditional Concrete Leveling Materials?
Yes, you can use eco-friendly alternatives to traditional concrete leveling materials. Fly ash, a by-product of coal combustion, and slag cement, a by-product of iron production, are both sustainable options.
They're not only beneficial for the environment but also enhance the durability of concrete. You'll find these materials offer superior performance in terms of strength, longevity, and resistance to harsh weather conditions.
Conclusion
So, there you have it! You've now got the whole shebang on concrete leveling.
From grasping the basics, gathering your toolkit, preparing the battlefield, to mastering the art of leveling, and keeping it shipshape.
Remember, practice makes perfect. With time, patience, and a sprinkle of these advanced techniques, your concrete surfaces will be as smooth as a baby's cheek.
So, go ahead and cement your newfound skills. Happy leveling!