Unveiling Secret DIY Concrete Leveling Techniques
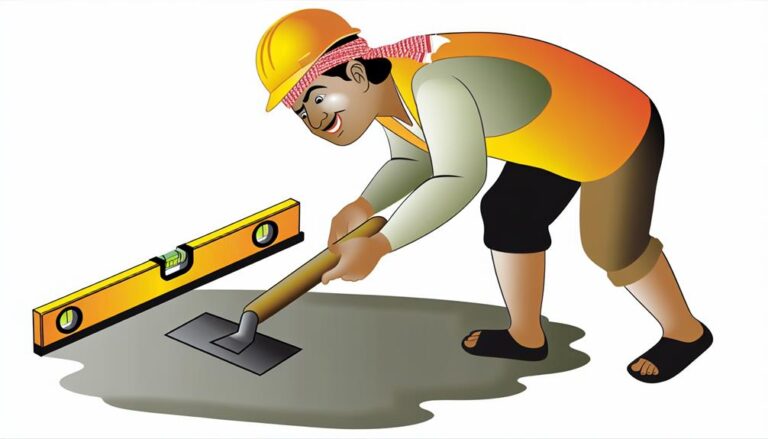
To level concrete, first clean the area and remove all debris. Mix self-leveling concrete to the right consistency, start at the highest point and work your way down, using a trowel to guide the mix. Make sure you have the right tools such as a screed board or bull float. Maintain a curing temperature between 50 and 85 degrees Fahrenheit for optimal strength and durability. Avoid rushing or neglecting proper techniques, these could lead to an uneven surface or cracks. And remember, there's more to discover if you stick with the process.
Understanding Concrete Leveling Basics
Before diving into DIY concrete leveling, it's crucial that you grasp the basics of this process. Simply put, concrete leveling is a procedure that aims to correct an uneven concrete surface by altering the foundation it sits on. It's a cheaper and more eco-friendly alternative to replacement.
You might wonder why your concrete is uneven in the first place. The culprit is usually a process called settlement. This happens when the soil underneath the concrete compresses, shrinks, or shifts, causing the concrete to sink or tilt. This can result from a variety of factors, such as soil type, moisture content, and the weight of the concrete itself.
Now, you're ready to level your concrete. But don't rush in yet. It's essential to understand that successful concrete leveling is all about timing. You need to act quickly when you spot signs of an uneven surface, like cracks or sinking. However, you also need to wait for the right weather conditions. Concrete leveling is best done on a dry, warm day.
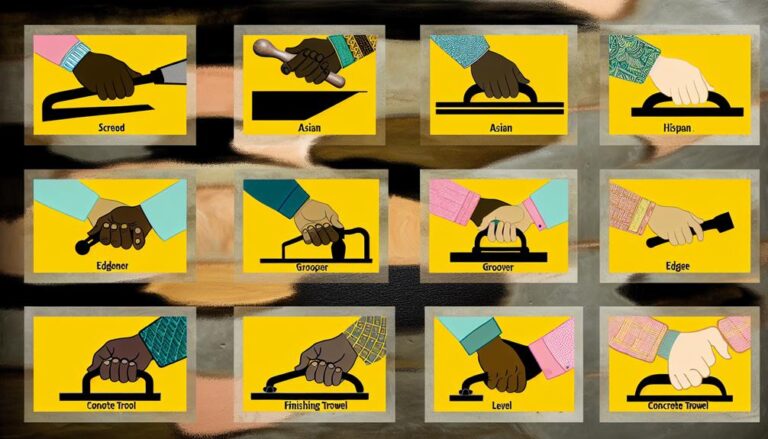
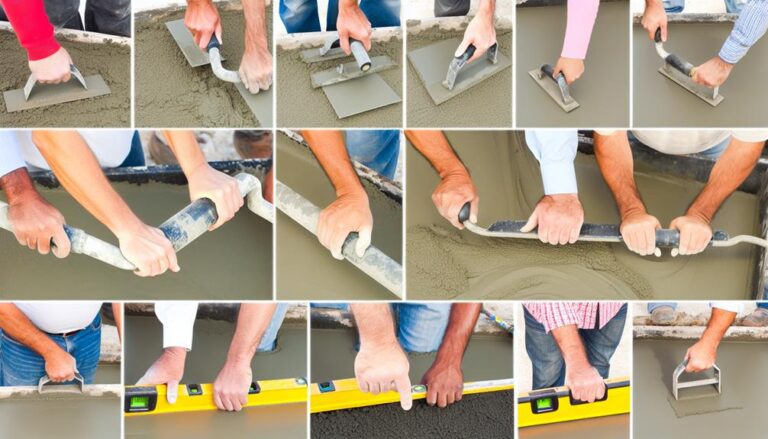
Necessary Tools for DIY Concrete Leveling
Now that you're aware of what concrete leveling entails and when to do it, let's look at the tools you'll need to carry out this task yourself.
Firstly, you'll need a concrete trowel. This tool smooths the surface of the concrete, ensuring an even finish. Some come with long handles, so you won't have to bend over while using it.
Secondly, a concrete rake or come-along tool is crucial for spreading and moving the concrete around.
Next, a screed board or straightedge is vital for leveling the concrete. It's used to scrape away excess concrete and create a flat, even surface. You'll also need a bull float to further smooth out the concrete after screeding. This tool removes any marks left by the screed and fills in small holes.
An edging tool helps create a neat border and rounds the edges of your concrete surface. Lastly, you'll require a groover tool to create control joints in the concrete, which helps prevent cracking.
Preparing the Area for Leveling
To prepare the area for leveling, you'll first need to clean the surface and remove any debris or loose concrete. Sweep the area meticulously with a stiff-bristled broom to eliminate dust, dirt and small particles. This is a crucial step to ensure a smooth, even surface for the forthcoming concrete leveling.
Next, inspect for any large cracks or holes. You'll need to patch these imperfections before proceeding. Use a concrete patching compound for this task. Apply it as directed by the manufacturer, ensuring to press it firmly into the cracks or holes with a trowel. Once filled, smooth the surface and allow the compound to dry completely.
It's also essential to prime the concrete surface. A good concrete primer will enhance the bonding of the self-leveling compound to the old concrete. Roll or spray it on evenly, making sure to cover the entire area. Allow the primer to dry thoroughly before moving on.
Lastly, set up a containment border around your work area to contain the self-leveling concrete. This could be a strip of wood or metal attached to the surrounding concrete with screws. This is a vital step, so don't skip it. Now, you're ready for the next phase.
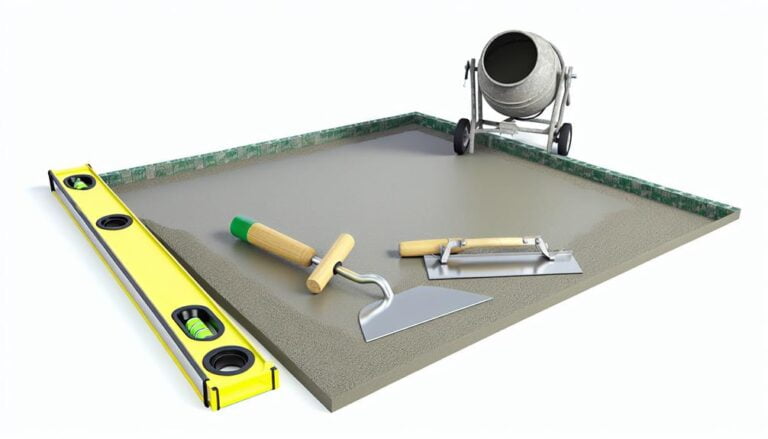
Mixing and Applying Self-Leveling Concrete
Once your area's prepped, it's time to get your hands dirty by mixing the self-leveling concrete. This isn't your regular concrete mix; it's specially formulated to flow out and create a smooth, level surface.
Start by pouring the concrete mix into a large bucket. Then, add water according to the manufacturer's instructions. It's crucial to get the water to concrete ratio just right, so don't skimp on measuring.
Mix the concrete and water using a paddle mixer attached to a drill. You're aiming for a consistency similar to pancake batter; it should be easy to pour but not too runny.
Here's a handy table to guide you through the process:
| Step | Material | Tool |
|---|---|---|
| 1 | Self-leveling concrete mix | Bucket |
| 2 | Water | Measuring jug |
| 3 | Mix until smooth | Paddle mixer and drill |
Once you've got your mix ready, it's time to apply it. Pour the mix onto your prepped area, starting at the highest point and working your way down. The concrete will start to level itself out, but you can also guide it with a trowel if needed.
Mastery of the Screeding Technique
Mastering the screeding technique is your next step in achieving a perfectly level concrete surface. This process involves dragging a long, flat board (the screed) across the top of the concrete to smooth and level it out. It's not as tricky as it sounds, but it does require some practice to get it right.
First, you'll need to prepare your screed. You can use a long, straight 2×4 piece of lumber or a specialized screed tool. The key is to ensure it's longer than the width of your work area.
Next, position yourself at one end of the concrete and pull the screed slowly towards you. The excess concrete will accumulate in front of the screed, which you'll then need to move out of the way. Don't worry if you leave slight ridges or grooves; they'll be dealt with in the finishing process.
Importance of Proper Concrete Curing
After you've leveled your concrete, it's crucial to let it cure properly to achieve the best possible strength and durability. Curing isn't just about letting your concrete dry; it's about allowing it to hydrate fully. You see, when water and cement mix, a chemical reaction occurs that hardens the mixture over time. It's a process that can take several weeks.
Here's a table illustrating the impact of proper curing on concrete properties:
| Concrete Property | Impact of Proper Curing |
|---|---|
| Strength | Increases significantly |
| Durability | Enhances greatly |
| Abrasion resistance | Boosts notably |
| Permeability | Reduces substantially |
| Shrinkage | Minimizes noticeably |
Skimping on curing time, you're risking lowered strength and durability, which you don't want. Curing temperature also matters. If it's too hot or cold, the curing process can be adversely affected. That's why it's recommended to maintain a curing temperature between 50 and 85 degrees Fahrenheit. So, after leveling your concrete, don't rush the curing. Let it take its time. Your patience will pay off in a stronger, more durable surface.
Common Pitfalls to Avoid in Concrete Leveling
While leveling concrete might seem straightforward, there are several common mistakes you should avoid to ensure a smooth, even surface.
First, don't rush the job. You might be tempted to speed up the process, but in concrete leveling, patience truly is a virtue. Trying to level too quickly can result in an uneven surface or even cracks.
Secondly, avoid adding too much water to your concrete mix. While it might make the mix easier to work with, it will weaken the concrete, which could lead to cracking or sinking. Always follow the manufacturer's instructions for the right water-to-concrete ratio.
Thirdly, don't neglect the use of a screed. This tool is crucial in achieving a level surface. By simply dragging it back and forth across your concrete, you can remove excess and fill in low spots.
Maintaining a Level Concrete Surface
To keep your concrete surface level and prolong its lifespan, regular maintenance is a crucial step not to be overlooked. It's not just about leveling your concrete once; it's about ensuring it stays level over time and through various conditions.
Firstly, clean your concrete surfaces regularly to remove dirt and debris that can cause wear and tear. Use a power washer for a deep clean and to remove stubborn stains. Don't neglect this step; it's more important than you might think.
Secondly, it's essential to seal your concrete surface after leveling. This keeps moisture out, preventing damage that can lead to an uneven surface. Choose a high-quality concrete sealer and apply it evenly across the whole surface.
Frequently Asked Questions
What Are Some Safety Precautions to Consider During DIY Concrete Leveling?
When you're tackling DIY concrete leveling, safety should be your top priority.
Always wear protective gear, like gloves and safety glasses, to protect yourself from concrete dust. Ensure you're using the right tools and handle them with care to prevent accidents.
Don't forget to keep your workspace well-lit and clear of unnecessary clutter. Lastly, take breaks when needed- you don't want to risk injury due to fatigue.
Are There Any Environmentally Friendly Alternatives to Traditional Concrete for Leveling?
Yes, there are green alternatives to traditional concrete for leveling. You can use fly ash or slag cement, byproducts of other industrial processes, instead of regular concrete.
They're not just eco-friendly, but they also improve the durability and workability of concrete. You're not only making a green choice but also enhancing your DIY project.
Can DIY Concrete Leveling Be Done in All Weather Conditions?
You can't perform DIY concrete leveling in all weather conditions. Wet or freezing temperatures can seriously affect the curing process. It's best to work on a dry, sunny day.
Extreme heat can also cause rapid drying, leading to cracks. So, you'll need to consider the weather forecast carefully before starting your project.
In adverse conditions, it's better to wait for a suitable day to ensure the longevity and quality of your work.
What Factors Can Affect the Durability of a Leveled Concrete Surface?
Like a knight facing a dragon, you're battling factors that can impact your concrete's durability. Weather's a big one. Extreme temperatures, rain, or frost can weaken it.
Poorly mixed concrete can crumble. Also, if you don't give it enough time to cure, it won't be as strong.
And remember, heavy loads can also damage your surface. So, it's not just a one-time task, you've got to maintain it to keep your 'castle' standing strong.
Are There Any Specialized Training or Certifications Required to Perform DIY Concrete Leveling?
No, there aren't any specialized certifications required for DIY concrete leveling. However, it's crucial for you to understand the process and have the right tools at hand. Proper training can help you avoid mistakes and achieve a smooth, durable surface.
Online tutorials, workshops, and home improvement guides can provide valuable insights. Remember, practice makes perfect. So, don't be afraid to start small and gradually take on larger projects as you gain confidence.
Conclusion
So, you've traversed the terrain of DIY concrete leveling, mastering the art of screeding and understanding the necessity of proper curing.
You've learned to avoid common pitfalls, ensuring your concrete surface remains steadfastly level.
But remember, maintenance is key. Just as a gardener tends to their blooms, you too must nurture your concrete.
With the right care, your newly leveled surface will stand as a testament to your skills, adding balance and beauty to your surroundings.